Welding equipment for classic car restorations
Mads van Appeldoorn
March 31, 2023
As Amazon Associate I earn from qualifying purchases. I may receive a small commission at no additional cost to you for purchases made through links in this post.
A guide to choose the right welding system
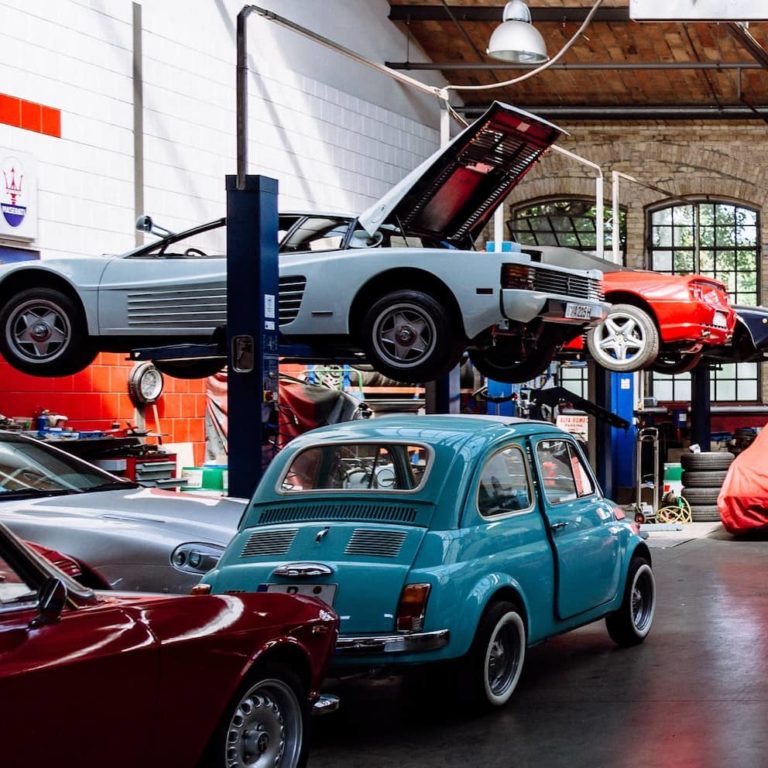
If you like old cars and like to hunt for bargains, then you can’t avoid rusty nuggets. Cars from the 1960s and 1970s are famous for rusting faster than you can say Indiana Jones. Nothing against Indiana Jones, his means of transport didn’t have the rust problem, but we probably wouldn’t want to trade them either. So there is nothing left but to turn the many pretty rust buckets back into sparkling diamonds.
And if you’ve paid a welder to do bodywork more than once, think about it – can I do it myself? Is it difficult? What do I need? Images come to mind of giant gas cylinders that exploded so gloriously in cartoons. The reality has long since passed the memories. Especially technically. At some point I thought, why don’t I try it myself? I bought a welding machine, the rest is history. Trial and error really. I had the chance to get a BMW 2002 tii very cheap, needless to say it was in very poor condition. A rusty little nugget but at least complete. I had no experience myself with welding, but always wanted to try that out. And to put it bluntly, I was very successful.
Anyway, if you don’t want to give your monthly pay check to a welder for the work of three days, you might consider trying that at home as well. And welding equipment is really not that expensive, so I gave it a go. It was the first stuff that was necessary after I took the car apart and removed all the undercoating, carpet and insulation leftovers. I thought buying welding equipment and learning how to weld would give me more freedom with my restorations and I could save a dollar or two.
However, with so many different types of welding equipment available, it can be challenging to know which system is the best choice. Here’s a little guide to help you choose the right welding equipment for your car restoration needs. Again that giant gas cylinders come to mind. But that’s something you don’t have to take into account.
First I read a lot, in forums, where you can often read the greatest nonsense. Unfortunately, that didn’t lead to much. On a trip to Tucson, AZ, I passed a body shop where an elderly man who looked like Santa Claus himself worked on an old Volkswagen. He looked like 100 years of experience and I thought I’d ask him. I got two coffees from the corner shop and approached him. And I had the most interesting conversation about welding that I can imagine. And all the tips he gave me encouraged me to buy a welder and try it. Since then I’ve welded so much, first closing roll bars, extensions, fenders, sunroofs, and later I also dared to do larger projects. Like the BMW 2002 that needed and still needs a lot of love.
MIG, TIG, Stick – Requirements for a welding machine
Vintage car restorations often require welding equipment that is very versatile and easy to use. Depending on the scope of the restoration, you may need equipment for both MIG and TIG welding, as well as plasma cutting and brazing. It’s essential to have high-quality equipment that can handle a variety of tasks to ensure that the restoration is done correctly. MIG welding is ideal for thicker materials and is quick and easy to use. TIG welding is best for thinner metals and provides precise and clean welds. Stick welding is versatile and can be used for a variety of materials, but it requires more skill to use effectively.
So when you are choosing welding equipment for car restorations, several factors should be considered. These include the power source, the size of the welding machine, the duty cycle, and the type of wire or electrode used. It’s essential to choose equipment that meets your specific needs, as well as any safety regulations that may be in place.
A versatile, easy to use and reliable option is a multi-process welder that can handle MIG, TIG, Stick, and flux-cored welding, even though not always necessary. But these machines provide the flexibility needed for car restorations and are often more cost-effective than purchasing separate machines for each welding process. Another important factor, may be not necessary to say but, is to consider when choosing welding equipment is the brand and quality. Investing in high-quality equipment from a reputable brand can ensure that your equipment lasts longer, performs better, and is safer to use. First I’ve but a system off craigslist, then I got braver and bought a decent system, but also tried other machines while helping friends with welding (with their own machines. Here are my top choices
Safety (absolutely) first
It might sound silly, but you really need to protect yourself, especially your eyes. So please do yourself a favour and wear safety glasses at all times in addition to the welding helmet with the correct grade of UV lens. Please also wear protective leather welding gloves as well as appropriate footwear with substantial uppers and rubber soles.
Top 3 welding machines for classic car restoration projects
My first system was capable of MIG, TIG and Stick welding, however, I used the TIG and Stick welding only. which somehow went into my decision for a future system. The machine broke after a few weeks, invested into the next, gave that to a friend in exchange for some garden work. Anyway, things led to another and I ended up with the first machine on the list which is my top recommendation.
1. Primeweld TIG 225X
That’s a recommendation I got from a friend in New York that I met through pelican parts after I told him about my experiences with the two following machines. Primeweld TIG 225X is a 225 amp welder which is capable of TIG and Stick welding. It works beautifully with thin materials, aluminum and stainless stell alike. The CK17 torch is super precise, comes with a very flexible hose which makes working with it a pure joy. Totally worth the money. I wish I would have bought that in the first place. Best choice in my life (in terms of welding of course).
2. Forney Easy Weld 140 MP
Thats a multi process welder I got to use when I was helping my friend Tom with the bodywork on his 911. It is a great bang for the buck, just like the machine I want to show you afterwards. This welding system is capable of MIG, TIG and Stick welding, however aluminum TIG welding is not possible working since it operates with the DC outlet. To sum it up, the Forney Easy Weld 140 MP is an awesome welder for a beginner or small projects around the garage.
3. Yeswelder Digital MIG-205DS
Best bang for the buck and the first (new) machine I bought after long hours of considerations and discussions. Great machine, powerful, does anything the Forney does as well but as an even lower price. If you want to learn how to weld, if you are unsure, whether welding is something for you and you are going to continue, get this little machine. It’s easy to set up, easy to use and very versatile. Perfect choice for smaller projects.
How to learn to weld
Welding is a valuable skill that can be used for personal and professional projects. While taking a class or working with an experienced welder can be helpful, it is possible to teach yourself welding with a few easy steps. Here’s how to get started:
Step 1: Research the different types of welding
Before you start to teach yourself welding, research the different types of welding to determine which one best suits your needs. MIG, TIG, and Stick welding are some of the most popular types of welding as described above. Some are more advanced then others.
Step 2: Choose your welding equipment
After deciding on the type of welding you want to learn, choose the right welding equipment. The recommendations above will help you with that. Start with a basic setup, including a welding machine, welding helmet, gloves, and safety glasses.
Step 3: Find a safe area to weld
Welding can be dangerous, so it’s crucial to find a safe area to weld. Set up your equipment in an area with good ventilation and away from flammable materials. Have a capable fire extinguisher available.
Step 4: Practice on scrap metal
Start practicing on scrap metal before attempting any projects. Begin with basic welds and work your way up to more complicated projects as you become more proficient.
Step 5: Get feedback
As you practice welding, it’s essential to get feedback from experienced welders. They can help identify areas for improvement and offer tips on how to improve your technique.
Step 6: Watch welding videos
There are several instructional welding videos available online that can provide additional guidance and tips on how to weld. These videos can supplement your self-teaching and provide additional insight into different techniques.
Teaching yourself welding takes time and practice, but it is possible. By researching the different types of welding, choosing the right equipment, finding a safe area to weld, practicing on scrap metal, getting feedback, and watching welding videos, you can develop the skills needed to become a proficient welder. After years of welding, there is still room for improvement, however, I’m happy that I don’t always have to pay $400 for every tiny weld seam. And I am very satisfied with all the results that don’t need to hide.