Another Porsche 911 Project #2
by Mads – March 30, 2020
Taking things apart
Once the car arrived in my garage, I didn’t spend too much time just looking at it.
That phase was already over.
This was the moment where everything gets real.
First check underneath
Whenever I get a new car, running or not, the first thing I do is put it on a lift.
Not because I expect problems, but because I want to understand what I am actually dealing with.
And surprisingly, the undercarriage of this car was in much better condition than expected. Even though it had lived in California, you never really know what 40 years of use, repairs, and changes can do to a chassis.
But structurally, it was a good starting point.
That already changed the tone of the whole project.
Engine and gearbox reality
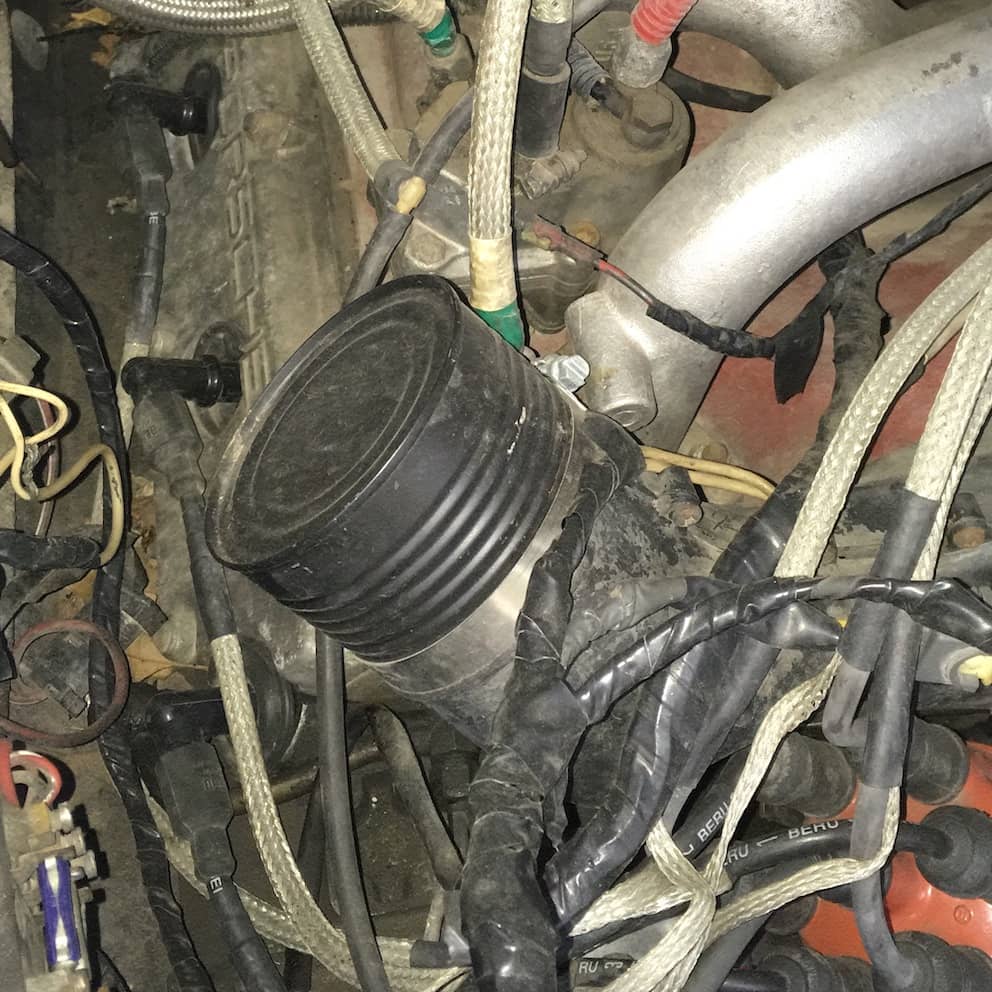
At first, I didn’t fully investigate the drivetrain. I had been told the car wasn’t running, so I assumed I would deal with that later.
But curiosity always wins.
So I got the engine running and checked what I could. The clutch worked, everything moved, but it was clear the engine wasn’t pulling properly.
Later it turned out compression was low. Not catastrophic, but definitely tired.
Still, that didn’t really matter at this point, because I already had a different plan for the engine anyway.
And that part would come later.
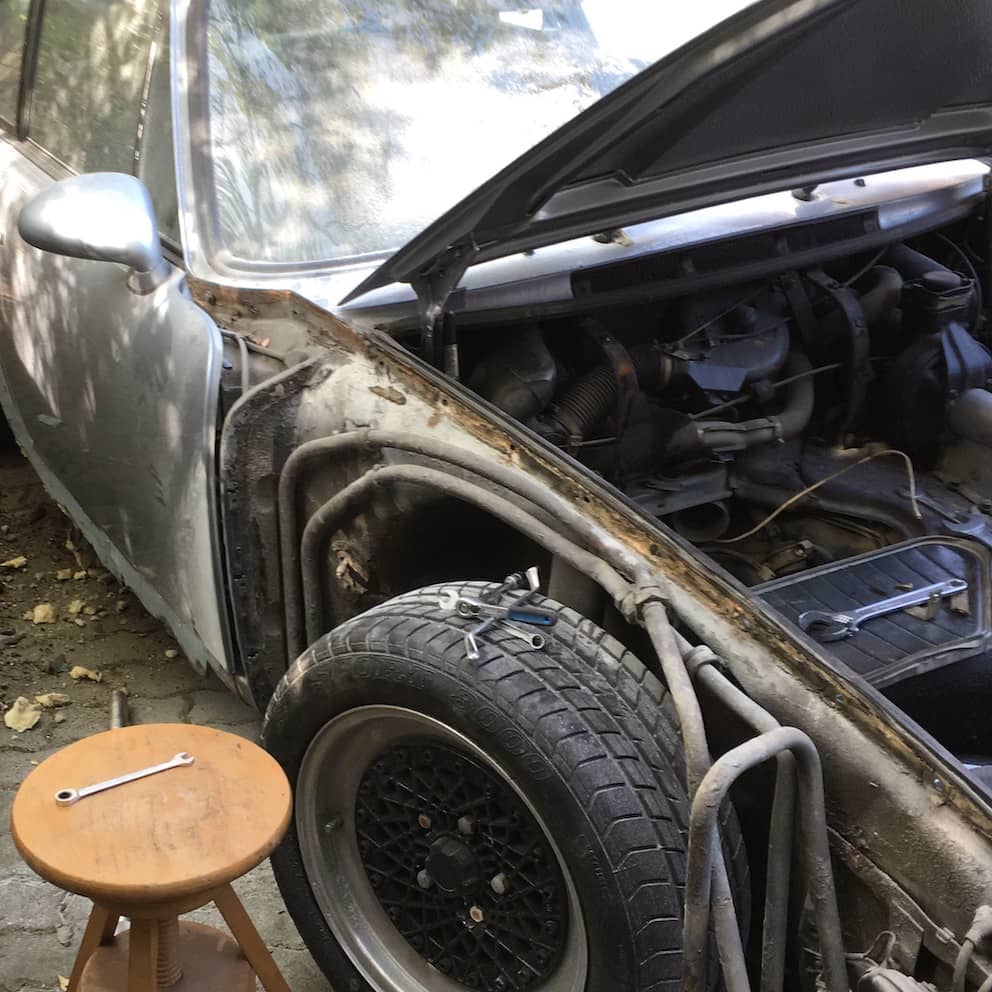
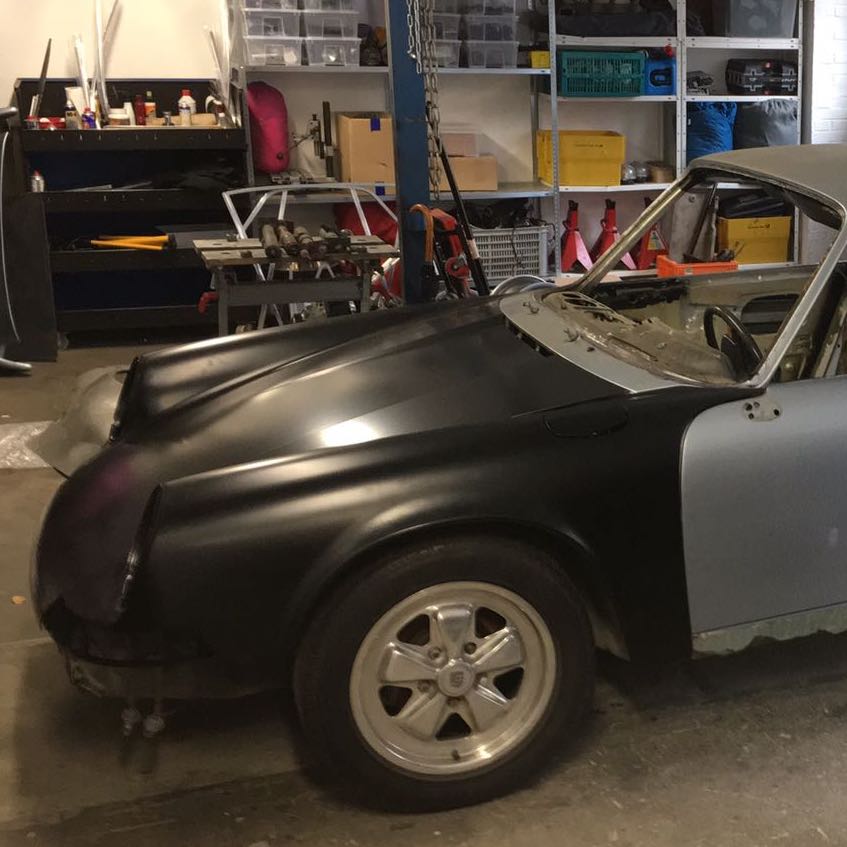
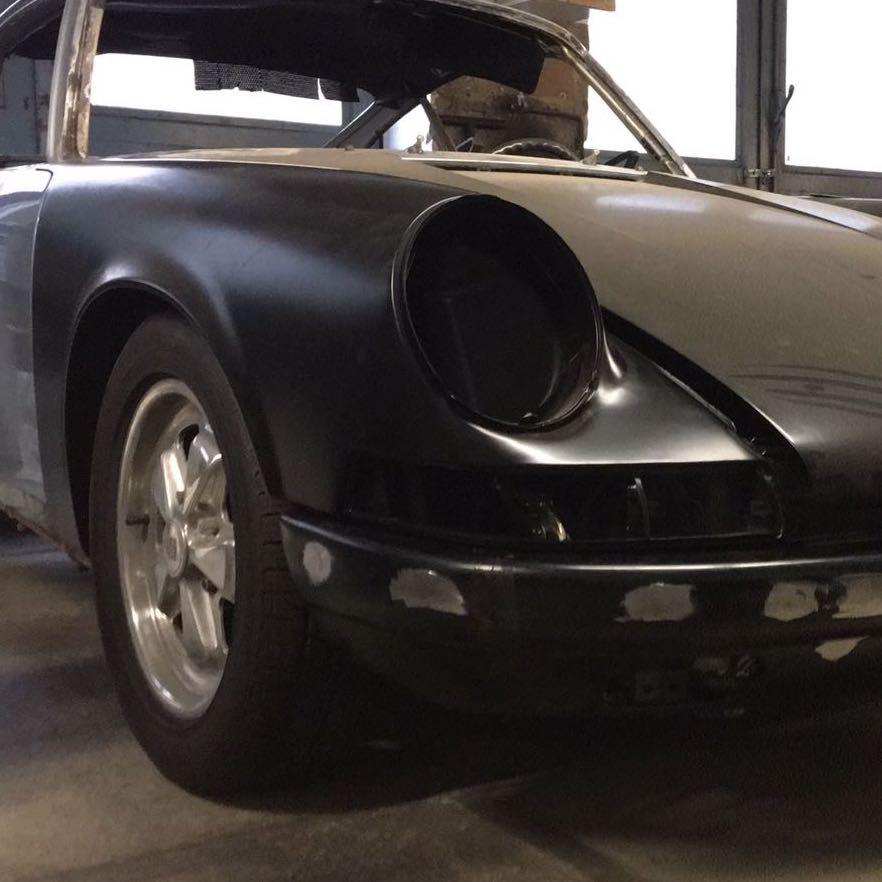
Stripping the body
I started from the outside and worked my way inward. The first goal was simple: remove everything that didn’t belong anymore.
The existing fiberglass body kit had cracks, poor fitment in places, and no real reason to stay on the car. So I stripped it off as quickly as possible.
No hesitation. Just removal.
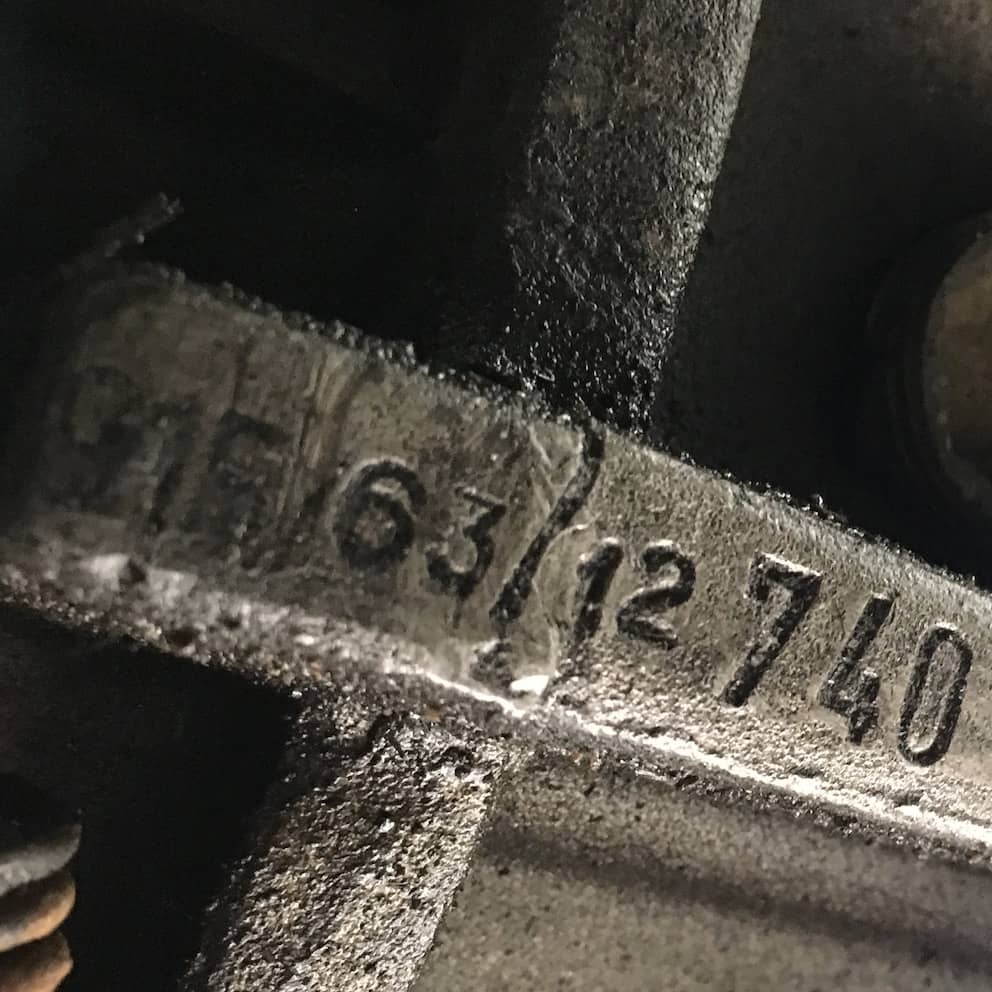
A surprising drivetrain
Next came the engine and gearbox. This time it went fast. About 30 minutes, and everything was out.
What I didn’t expect was what I found underneath the car’s identity. Both engine and gearbox were from a 911 SC. A 3.0 liter 180 hp unit paired with a factory limited slip differential gearbox marked with the correct /12 specification.
That was a good moment. Because it meant the mechanical base was actually better than the car’s appearance suggested.
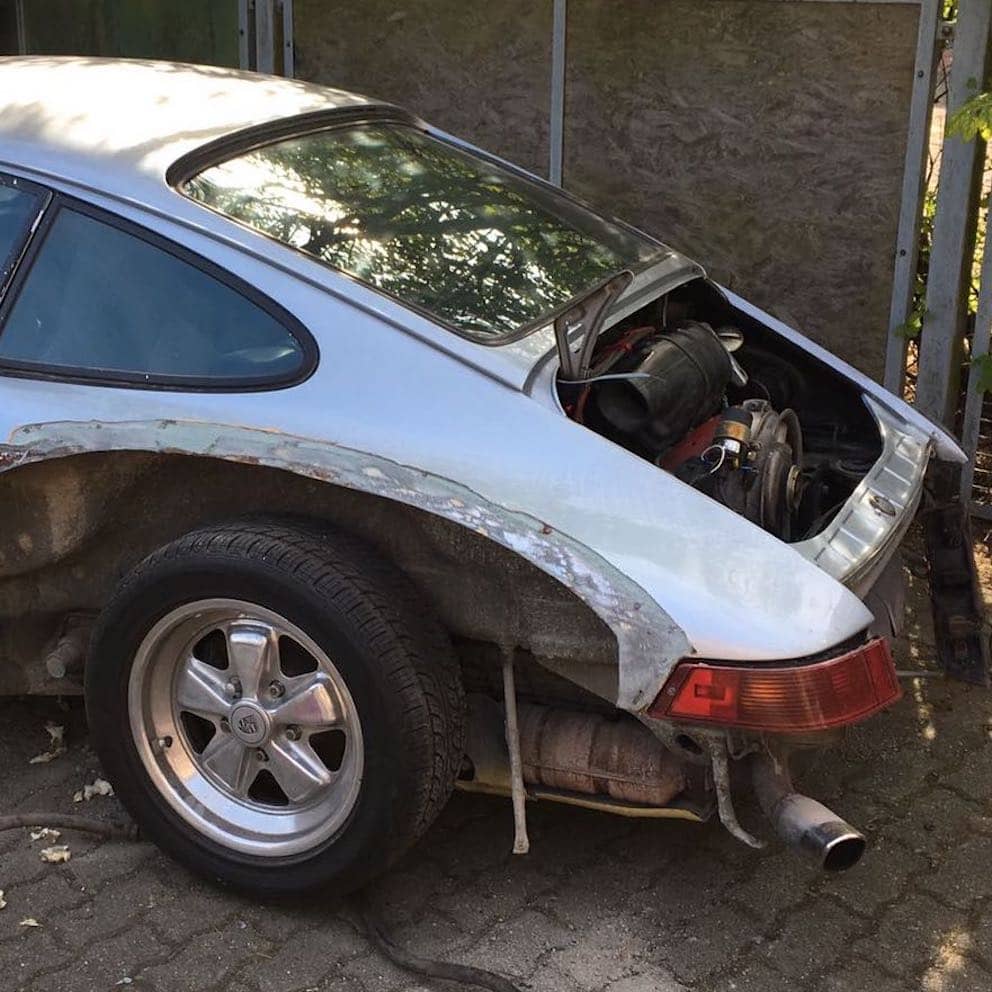
Going completely empty
Over the next few days, the car got lighter and lighter. Windows out. Interior out. Everything removed.
Since most of the interior components were still in reusable condition, I didn’t just throw them away. Seats, door cards, dashboard, parcel shelf – everything was sold on, mostly through enthusiast networks.
At that point, the car was just a shell on wheels. Still rolling, but completely stripped.
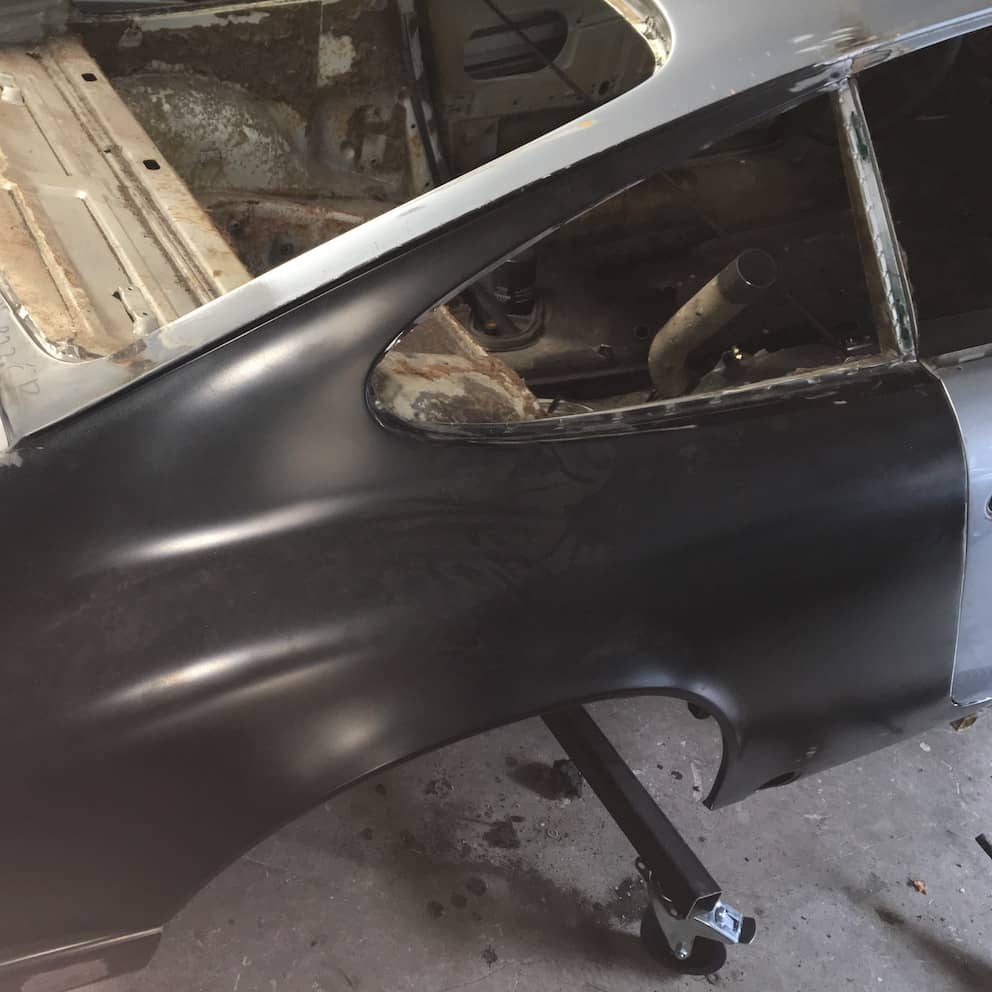
New direction: metal over fiberglass
The next decision was structural rather than cosmetic. I started sourcing proper metal body panels.
I had used fiberglass and mixed materials before, and I knew exactly what I didn’t want this time: inconsistent fitment, small visual differences, and the feeling that the car is made of mixed layers.
So I went for metal wherever possible. Safety was part of it, but the bigger reason was visual honesty. Metal behaves differently under paint, under light, under time. It ages in a way that feels more consistent.
That mattered to me.

Rear end and fabrication work
The rear was more complex.
This time it involved welding, fitting, and proper bodywork. Narrow body panels were sourced, including rear fenders and bumper sections.
Everything was aligned and prepared step by step until the rear structure was set. At the same time, I removed suspension, axles, and braking components. The car was getting closer to a bare rolling shell.
A temporary solution to move it
At some point, I needed a way to move the car around the garage. So a simple dolly system was built with the help of a welder friend. Nothing fancy, just functional.
But it made a big difference, because suddenly the shell became mobile again. And that meant it could leave the garage for the next stage.
First glimpse of the future colour
Before the car left for the next workshop, I did something I usually don’t do that early in a build. I started experimenting with paint.
Just small sections, just to understand the direction. A paint shop mixed a sample for me, and I had it put into a rattle can so I could test it on different areas of the body.
At some point, I even converted one of the shots to black and white just to see how the shapes would read without colour distraction.
And that was the moment I knew. That would be the final colour.
I had chosen it on the day I first saw the car in Ontario, and I never changed my mind since.
